Completed Setup
What is really needed?
The least that I recommend is:
- Battery
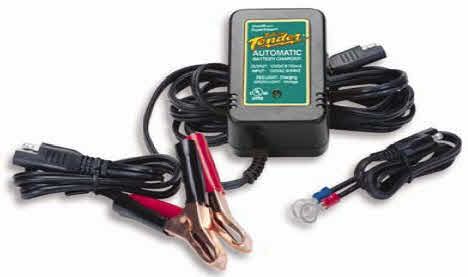
- Battery Tender
- Battery Box
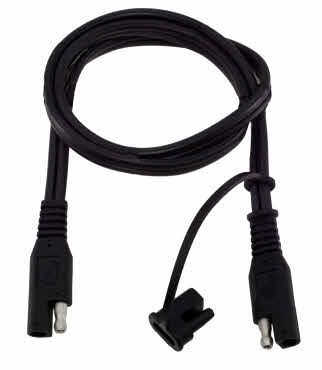
- Shared Use Connection
- DC to xPAP Connection
Of course the battery, and battery tender (and even the battery box) are sized to your power requirements. The Shared Use Connection is not strictly needed, but allows you to plug in and use your xPAP unit without the need to unplug. The basic design assumes a heated humidifier is not used. Of course, if you purchase a large enough battery and appropriate DC to xPAP connection, then even a heated humidifier can be used. The beauty of the design is that it will just keep working, even if your power to the house fails during your sleep.
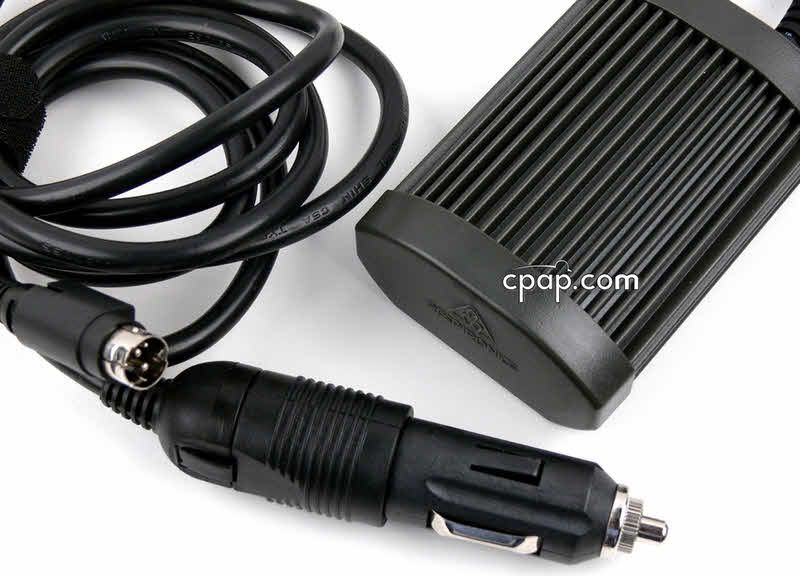
The DC to xPAP connection is needed and is based upon your specific xPAP unit:
Some, such as Respironics, allow a direct DC connection. This is cheaper and uses the least amount of power, thus decreases the size of the deep cycle battery required. This means a smaller, lighter and less expensive battery will work for such a setup.
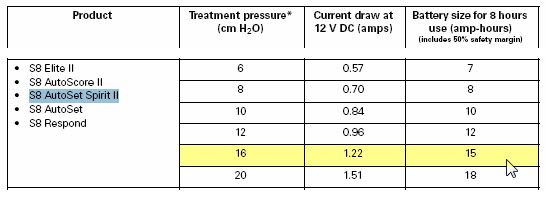
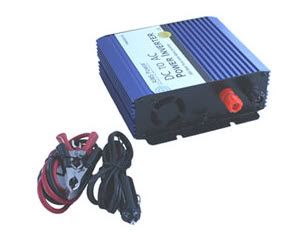
Other units, such as many of the ResMed S8 units, can use a DC to DC converter. This converter is designed to regulate the power from the battery, which can vary over time and use. It also can be used to convert from one voltage level to another, such as 12V DC to 24V DC. Though not as efficient as a direct DC connection, it does use less power than a modified sine wave inverter and much less power than a pure sine wave inverter. Additionally, since the DC converter helps condition power, it also helps better protect your xPAP unit.
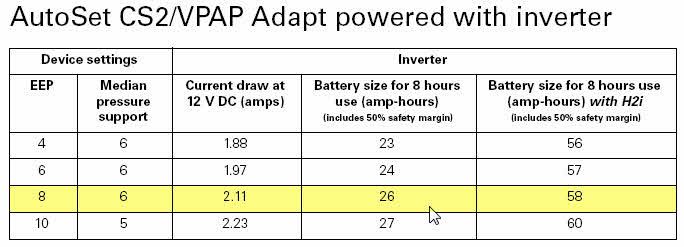
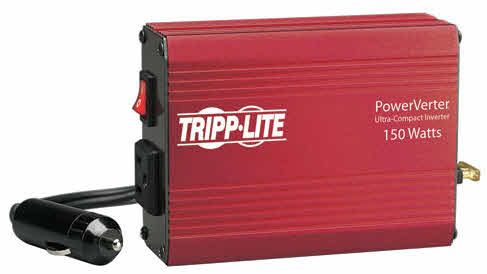
Some units, such as the Resmed VPAP Adapt SV units require an inverter to operate. Though a little less efficient than a direct DC connection or a DC converter, a modified sine wave inverter does not require excessive overhead power to operate. This also allows the greatest flexibility for connecting other devices.
Finally, some units, whether by design or due to the added use of a heated humidifer, require a pure sine wave inverter. Between the added load of the humidifier and the pure sine wave inverter, these units require almost twice the battery power of a modified sine wave inverter. However, this will allow a user to continue to use the heated humidifer, even if the power fails. This could be very important in either very dry climates or very cold weather conditions.
This section shows pictures of the completed setup
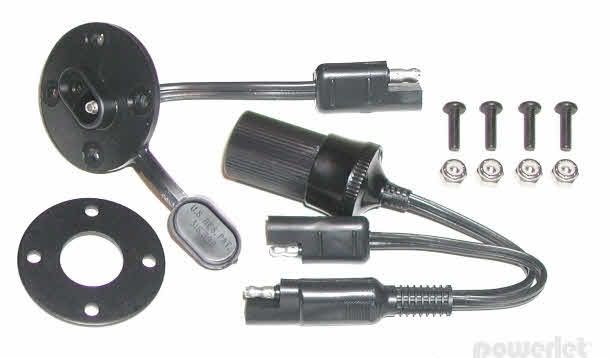
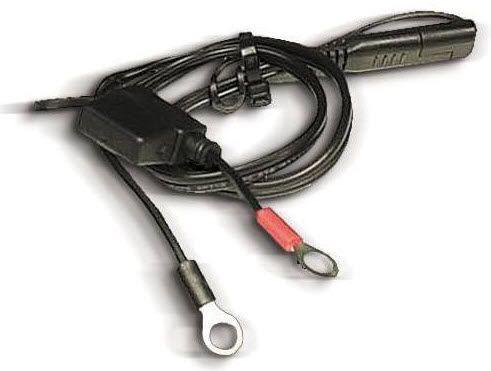
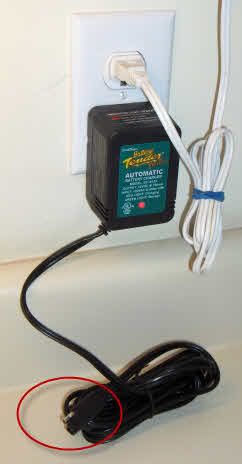
Here's the Battery Tender Jr. plugged into an outlet. Note the end of the cable. This SAE automotive connector allows different cable ends to be attached. This allows me to use the Shared Use Connection cable (a Y cable). Thus, both the inverter and the battery tender can be connected to the same battery at the same time.
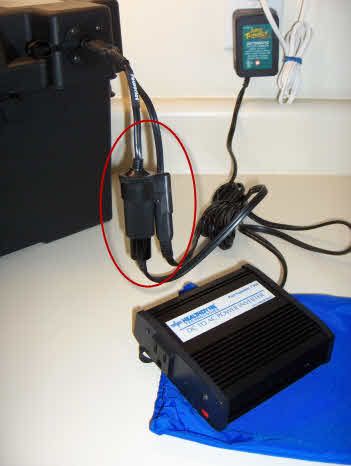
This then plugs into the matching SAE automotive connector (to the right on the picture below) of the shared use cable.
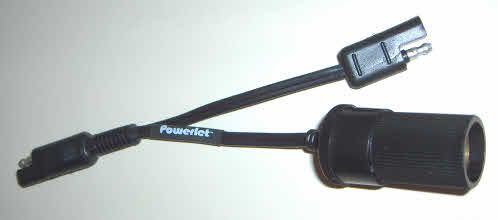
This SAE automotive connector to the left of the Y cable (on the picture below) then plugs into the power outlet on the battery box. The cigarette lighter / power port is where the inverter will connect.

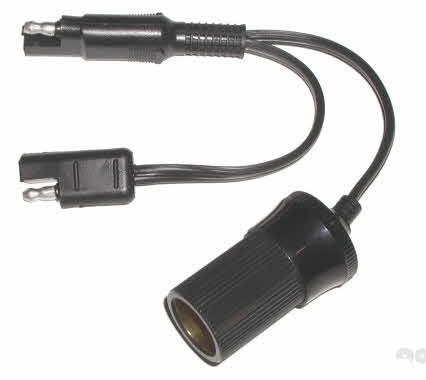
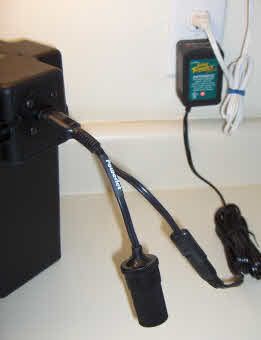
And here they are connected together. The cigarette lighter / power port is ready for the inverter. They can be connected and used at the same time in this configuration.
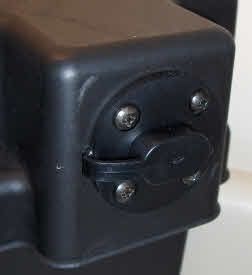
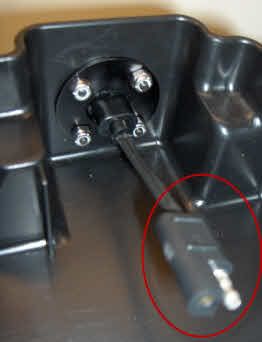
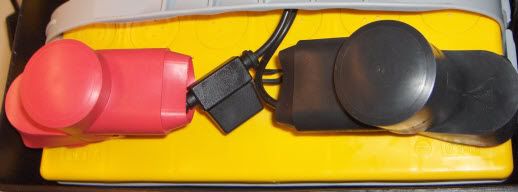
Next, let's look inside the battery box. You will notice, inside the box (in the highlighted area) the same connector is present. Thus, though from different companies, by using the same SAE automotive connector, we can add the battery box access and/or the shared use cable to the battery tender product.
Here's the connector on the inside of the battery box. Note the same SAE connector as the Battery Tendor cable.
This connects to the portion of cable from the battery tender product that connects to the battery. Note how the SAE connectors fit together.
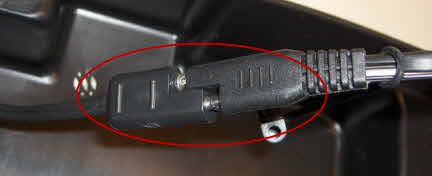
Though the cables fit together snugly, they are note (nor are they intended to be) water tight. Instead, they fit together well enough to not come apart easily. Thus they will stay secure even if the battery box is bumped about a bit.

Finally, the other end of that cable is attached to the battery posts. This cable uses battery clamps to connect to the battery. Remember, Red is Positive. Black (or any other color) is Negative. The posts are marked with either a plus [ + ] or a minus [ - ] for positive or negative.
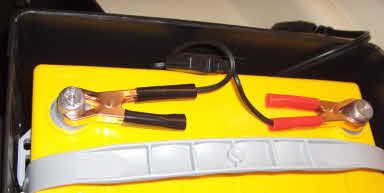
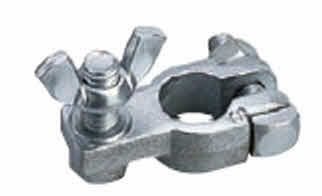
When I receive the battery post to marine terminal conversion clamps and the covers for them, I will take more pictures. In the long run that approach will provide less problems. Due to corrosion and vibrations, over the course of the next 5 to 8 years the battery clamps may fail to provide a strong connection. The clamps offer a better long term solution.
- - - - - - - - - - - - - - - - - - -
UPDATE: So, as mentioned, I purchased the battery post to marine terminal connectors. I chose the postive connector to allow the 3/8" connector to handle the ring terminal connectors. I had to really tighten this down on the negative post. But it's good and solid.
I found I had to "screw" the terminal connectors on a ways to allow the wing nuts to continue the process. (It was a tight fit). I also purchased a small packet of battery post grease (essentially a colored vaseline) to protect all the battery post and terminal parts.
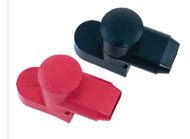
Then I topped it all off with the battery terminal covers. This is a VERY solid connection. It should not move. It should not have real problems with corrosion. It should not have problems with accidental shorts. I've done what I can to minimize problems.
- - - - - - - - - - - - - - - - - - -
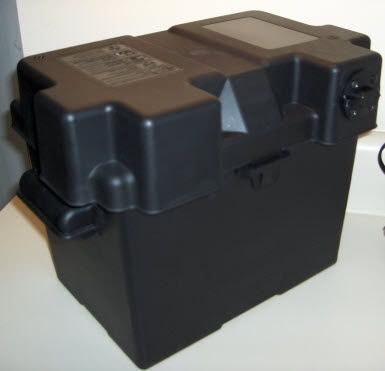
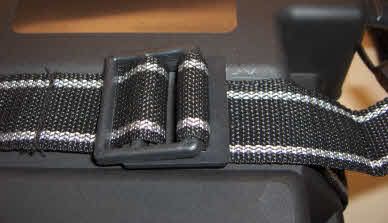
Finally, to tidy up the configuration, close the lid and add the strap for the battery box. This helps make it harder for the lid to be removed without adult supervision. The battery box does include "catches" to help keep the box shut. However, since this will be in an area where little fingers might hunt, an extra method to slow them may help.
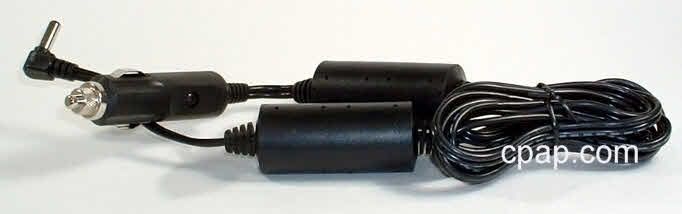
Now it's time to look at the inverter. Note the inverter includes both a connector that inserts into an automotive cigarette lighter (also known as a Power Port). Then on the other side is a standard AC plug. Obviously, the outlet will differ by country and the prevailing voltage and outlet design.
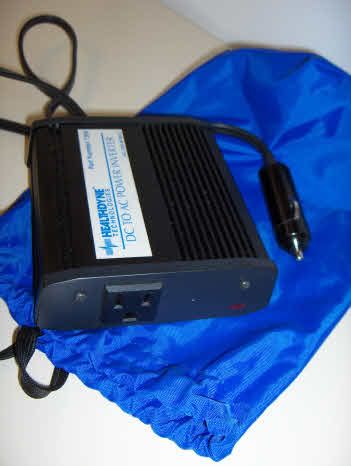
And then we connect it all together. Note that both the inverter and the battery tender are connected and will work at the same time. The advantage is that if we loose power, the battery will continue to operate the inverter and that will provide power to my ASV unit. This will allow me to sleep through any power outages. The current configuration assumes I will not use a heated humidifier. However, if I substitute the modified sine wave inverter for a pure sine wave inverter, I could use my humidifier.
Hope this helps other see how they can put together a battery backup system for their xPAP units.